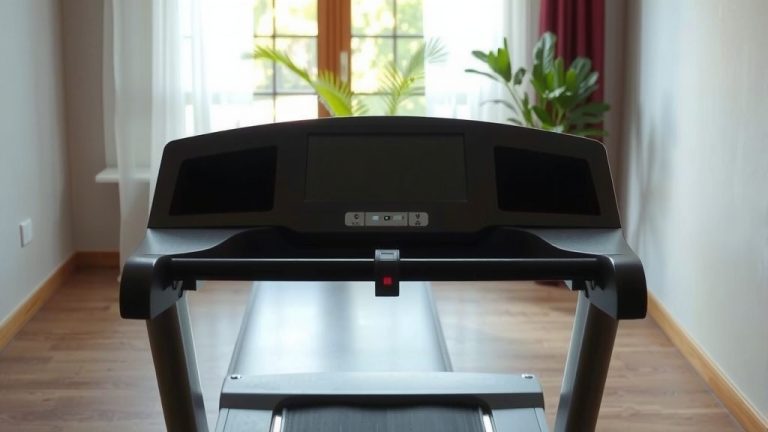
How To Fix A Ripped Treadmill Belt?

A ripped treadmill belt generally requires replacement for safety and optimal function, as minor tears can worsen rapidly during use. While small snags might allow temporary patching, any significant rip in your treadmill belt usually means it’s time for a new one to prevent accidents and maintain smooth operation.
- A significantly ripped treadmill belt usually needs replacing.
- Minor snags might be patchable, but it’s often a temporary fix.
- Prioritize safety by unplugging your treadmill before any work begins.
- Belt replacement involves removing the old belt, cleaning the deck, installing a new one, lubricating, and proper tensioning.
- Regular maintenance helps prevent future rips and extends belt life.
How To Fix A Ripped Treadmill Belt?
To fix a ripped treadmill belt, you will almost always need to replace it entirely, especially if the tear is large or deep. Minor surface snags can sometimes be patched, but these are often temporary solutions that don’t restore full integrity.
Why A Ripped Treadmill Belt Is A Big Deal
Imagine running on a frayed rope – not safe, right? A ripped treadmill belt presents similar safety risks and performance issues. It can cause you to trip, or even damage your treadmill’s motor if ignored (Mayo Clinic).
Beyond safety, a damaged belt won’t track correctly, creating a jerky or uneven surface. This compromises your workout and could lead to injuries over time. We understand your frustration, but addressing this promptly is vital.
Understanding Treadmill Belt Damage
What exactly does “ripped” mean for your treadmill? Sometimes it’s a small, shallow tear on the surface. Other times, it’s a complete separation of the belt material, perhaps along the seam or edge. A small fraying edge is different from a large, deep gash.
The extent of the damage dictates your next steps. A tiny surface scuff might not be as urgent as a full-blown tear that exposes the underlying belt layers. Take a moment to assess the situation closely.
Is Your Belt Fixable Or Replaceable?
This is the big question, isn’t it? For most significant rips, holes, or deep tears that compromise the belt’s integrity, replacement is the safest and most effective option. Attempting to repair a severely damaged belt could lead to further problems.
Minor surface snags or small abrasions, which haven’t gone deep, might be temporarily mended with a strong, flexible adhesive or specific repair kits. But think of it like patching a worn tire; it’s never as good as a new one. Many experts suggest replacing belts if there’s any doubt about safety (Consumer Reports).
Safety First: Before You Begin Any Work
We can’t stress this enough: always unplug your treadmill before you touch anything. This isn’t just a suggestion; it’s a critical safety measure. You wouldn’t work on an electrical appliance while it’s still plugged in, would you?
Beyond unplugging, consider your workspace. Ensure you have good lighting and enough room to move around the machine comfortably. This prevents accidental slips or further damage during the process.
Tools You’ll Need For A Treadmill Belt Replacement
Alright, let’s gather our gear. Having the right tools makes the job much smoother. You likely have most of these lying around your garage or toolbox already. Here’s a quick checklist:
- Allen wrenches (often included with your treadmill)
- Screwdrivers (Phillips and flathead)
- Pliers (sometimes helpful)
- Measuring tape (to double-check belt size)
- Vacuum cleaner or shop vac
- Clean cloths and a mild cleaning solution
- Treadmill belt lubricant (usually silicone-based)
- Your new replacement treadmill belt
Step-by-Step: Removing The Old Ripped Belt
This is where the real work starts. Don’t worry, it’s more straightforward than it sounds. You’ll begin by locating the end cap or motor cover, usually at the front of the treadmill. Unscrew it carefully and remove it to access the motor area.
Next, you’ll need to loosen the tension bolts at the rear of the treadmill. These usually require an Allen wrench. Turn them counter-clockwise until the belt becomes loose enough to slide off. Then, you can carefully lift and remove the old, ripped treadmill belt from the rollers and deck.
Cleanliness Is Key: Prepping The Deck
Think of this as giving your treadmill a fresh start. With the old belt off, you now have access to the running deck underneath. This surface often accumulates dust, debris, and old lubricant residue. Ignoring this step could shorten the life of your new belt.
Use your vacuum cleaner to remove any loose particles. Then, wipe down the deck thoroughly with a clean cloth and a mild cleaner. Make sure the surface is completely dry before proceeding. A clean deck ensures optimal performance and longevity for your new belt.
Installing Your New Treadmill Belt
Now for the exciting part – putting on the new belt! Gently slide the new belt onto the running deck, ensuring the correct side is facing up. It might feel a bit snug at first, which is normal. Carefully center it as much as possible.
Once it’s generally in place, thread it around both the front and rear rollers. Take your time to ensure it’s sitting correctly and not twisted. This step often requires a little patience and gentle coaxing.
Lubrication: A Smooth Start For Your Belt
Just like an engine needs oil, your treadmill belt needs lubrication. This reduces friction between the belt and the deck, which in turn saves your motor from overworking and extends the life of both the belt and the machine. Many treadmill manufacturers recommend lubricating after belt replacement (ProForm support guides).
Apply the recommended silicone-based lubricant under the belt, typically in an ‘S’ pattern, or according to your treadmill’s manual. Lift the belt slightly to spray the lubricant directly onto the deck. Avoid using WD-40 or other non-approved lubricants, as they can damage your belt.
Tensioning And Alignment: The Final Touches
This is arguably the most crucial step for a smooth, safe workout. Begin by tightening the rear tension bolts slowly and evenly, turning them clockwise a quarter turn at a time. The goal is to make the belt snug, but not overly tight. An overly tight belt strains the motor.
Plug in your treadmill and run it at a low speed (e.g., 2-3 mph). Observe the belt. Is it tracking straight? If it drifts to one side, adjust the corresponding tension bolt in small increments until it’s centered. This process often takes a few minutes and some fine-tuning. A properly tensioned and aligned belt prevents premature wear.
Testing Your Treadmill Safely
You’ve done the hard work, now let’s see the results! Start by walking on the treadmill at a slow pace. Listen for any unusual noises or movements. Does the belt feel smooth? Gradually increase the speed and incline, paying attention to how the belt tracks and feels underfoot.
Walk or jog for about 5-10 minutes to ensure everything is stable and feels normal. This test run helps confirm that your new belt is properly installed, tensioned, and aligned for your workouts. If you notice any issues, stop and re-check your adjustments.
Preventing Future Treadmill Belt Rips
An ounce of prevention is worth a pound of cure, right? Taking a few simple steps can dramatically extend the life of your new treadmill belt and prevent future rips. Regular maintenance is your best friend here.
It’s not just about cleaning; it’s about understanding the stressors on your belt. By keeping these tips in mind, you’ll enjoy many smooth workouts without unexpected interruptions. Here’s a quick overview:
| Common Causes of Rips | Prevention Strategy |
|---|---|
| Lack of Lubrication | Lubricate every 3-6 months (or per manual). |
| Improper Tension | Check belt tension monthly; adjust if too loose/tight. |
| Poor Alignment | Monitor belt tracking; adjust if it drifts to one side. |
| Dirty Deck/Belt | Clean deck regularly; vacuum under motor cover. |
| Worn Deck | Inspect deck for grooves/damage; replace if necessary. |
| Overloading | Stay within treadmill’s weight capacity. |
When To Call A Professional
Sometimes, despite your best efforts, a situation might feel beyond your comfort zone. If you’re unsure about replacing the belt, or if your treadmill has other underlying issues, calling a professional is always a smart move. There’s no shame in seeking expert help.
Treadmills can be complex machines, and a professional technician can quickly diagnose and fix issues you might miss. They have specialized tools and experience to ensure your machine is safe and functional. Your safety and peace of mind are worth it.
Conclusion
Dealing with a ripped treadmill belt can be frustrating, but with the right approach, it’s a fixable problem. For most significant tears, replacing the belt is the safest and most effective solution. Remember to prioritize safety by unplugging your machine before any work. By carefully following the steps for removal, cleaning, installation, lubrication, and tensioning, you can restore your treadmill to prime condition.
Don’t forget that consistent maintenance is the key to preventing future rips and extending the life of your equipment. A well-maintained treadmill means more consistent, enjoyable, and safer workouts for you. If in doubt, remember that a professional technician is just a phone call away. Now, go enjoy your smooth run!
Frequently Asked Questions About Ripped Treadmill Belts
How often should a treadmill belt be replaced?
The lifespan of a treadmill belt varies greatly depending on usage, maintenance, and quality. Generally, with regular lubrication and proper tension, a belt might last 5-10 years. Heavy use or neglect can shorten this to 2-3 years, or even less (NIH research indicates wear is highly correlated with frequency and intensity of use).
Can a treadmill belt be repaired with tape or glue?
For minor surface scuffs or very small, shallow snags, a strong, flexible adhesive specifically designed for rubber or fabric might offer a temporary fix. However, tape or standard glue is generally ineffective and unsafe for significant rips, as the constant friction and stretching will quickly break down the repair.
What causes treadmill belts to rip or fray?
Common causes include lack of lubrication (leading to excessive friction and heat), improper belt tension (too loose or too tight), misalignment, a worn-out running deck, or simply age and heavy usage. Objects getting caught under the belt can also cause sudden tears.
How much does it cost to replace a treadmill belt?
The cost of a replacement belt itself can range from $70 to $200 or more, depending on your treadmill model and brand. If you hire a professional, labor costs can add another $100-$300, making the total cost typically between $170 and $500.
Is it difficult to replace a treadmill belt myself?
Replacing a treadmill belt is a DIY-friendly task for most handy individuals, often requiring basic tools and patience. The most challenging parts are often ensuring proper tension and alignment afterwards. Many online tutorials and your treadmill’s manual can guide you through the process step-by-step.